iPhone Boot Process Deep Dive
Every time an iPhone powers on, it follows a strict boot sequence.
It does not jump directly into iOS.
Instead, multiple boot stages execute in order.
Each stage verifies the next.
This is Apple’s secure chain of trust.
For technicians, understanding this process is critical.
Because many faults happen at specific boot stages.
And identifying the exact stage can drastically speed up diagnosis.
This article breaks down the complete boot process—from power button press to iOS launch.
Overview of the Boot Chain
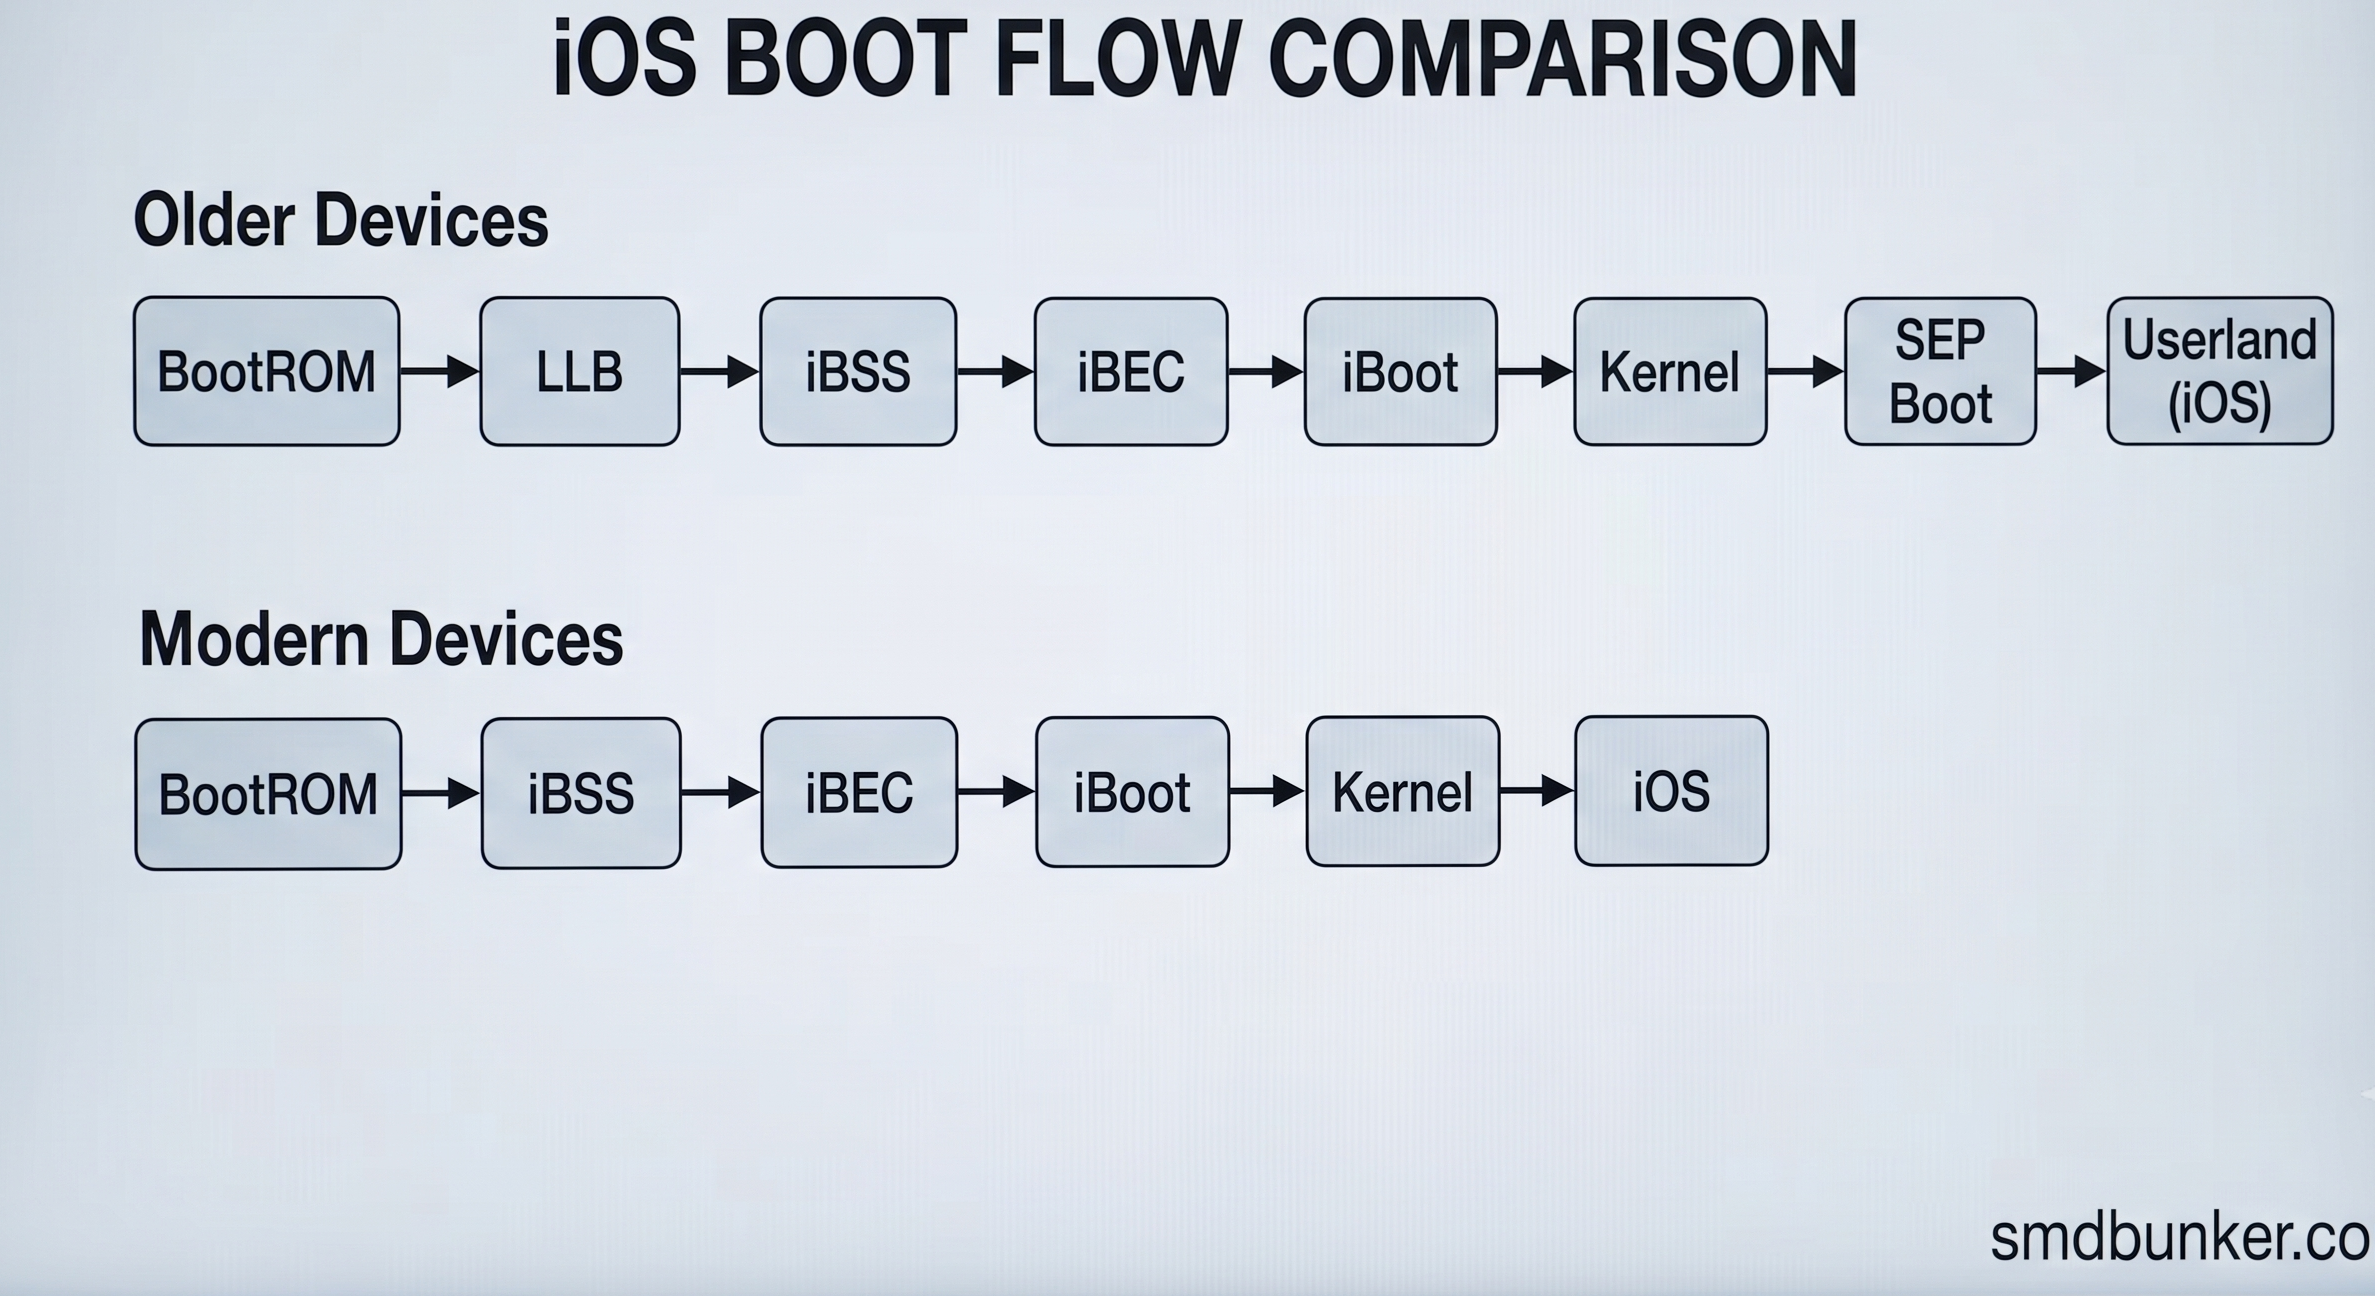
Simplified boot flow:
BootROM
↓
LLB (older devices)
↓
iBSS
↓
iBEC
↓
iBoot
↓
Kernel
↓
SEP Boot
↓
Userland (iOS)
On modern devices:
BootROM
↓
iBSS
↓
iBEC
↓
iBoot
↓
Kernel
↓
iOS
Every stage verifies cryptographic signatures.
Unsigned code is rejected.
This is the foundation of Apple security.
Related:
Understanding Apple BootROM Security
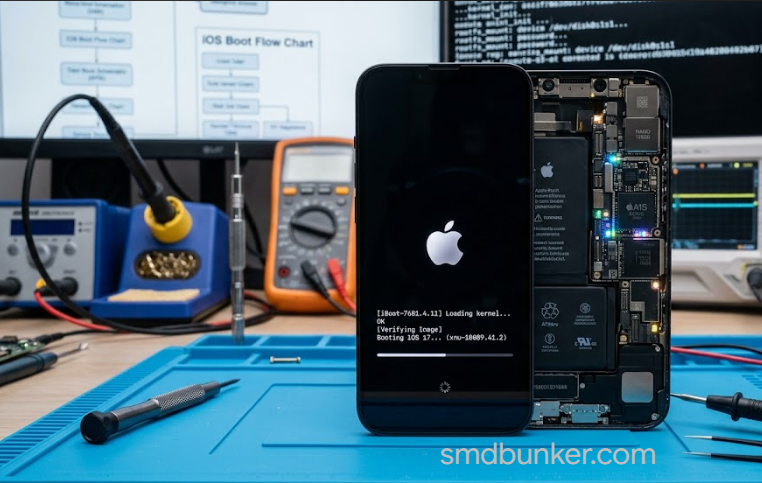
Stage 1: BootROM (SecureROM)
BootROM is the first code that runs.
It is hardcoded into the SoC.
Cannot be modified.
Its responsibilities:
- initialize minimal hardware
- initialize USB
- verify next boot stage
- provide DFU mode
This is the root of trust.
Important:
If BootROM is exploited, security collapses.
This is why checkra1n and palera1n are so powerful.
Related:
How checkm8 Works Internally
BootROM Modes
BootROM can enter:
Normal Boot
Continues secure chain.
Recovery Mode
Handled by iBoot.
Used for restore.
DFU Mode
Handled directly by BootROM.
Allows low-level firmware upload.
Critical for:
- restores
- exploits
- diagnostics
Related:
Recovery Mode vs DFU Mode
Stage 2: LLB (Older Devices)
LLB = Low Level Bootloader.
Used in older devices.
Responsibilities:
- more hardware initialization
- verifies iBoot
Modern devices largely replaced this stage.
Still important historically.
Stage 3: iBSS
iBSS = iBoot Single Stage.
Temporary restore bootloader.
Loaded during DFU restores.
Responsibilities:
- DRAM initialization
- USB stack upgrade
- hardware preparation
- verify iBEC
Think of it as restore bootstrap.
Related:
iBSS and iBEC Explained
Stage 4: iBEC
iBEC = iBoot Epoch Change.
This is a more advanced restore bootloader.
Responsibilities:
- load ramdisk
- parse restore images
- initialize NAND
- pass boot arguments
Important:
Most diagnostic workflows rely heavily on iBEC.
This is where custom ramdisks become possible.
Related:
How Ramdisks Work in iPhone Diagnostics
Stage 5: iBoot
This is the main bootloader.
It is much larger.
More powerful.
Responsibilities:
- verify kernelcache
- verify devicetree
- verify trustcache
- initialize final hardware
- prepare kernel launch
This is the final security gate before iOS.
If iBoot fails:
boot stops.
Stage 6: Kernel Initialization
Once verified:
iBoot loads the iOS kernel.
Kernel responsibilities:
- memory management
- process management
- drivers
- filesystem mounting
- hardware communication
At this point:
iOS starts becoming alive.
Important:
Kernel panics happen here.
This is where panic log analysis becomes critical.
Related:
Panic Log Analysis for Hardware Fault Detection
Stage 7: NAND Initialization
Storage is mounted.
APFS containers load.
Important partitions:
- System
- Data
- Preboot
- Recovery
If NAND fails:
boot loops or restore failures may occur.
Related:
iPhone NAND Architecture
Stage 8: Secure Enclave (SEP) Boot
The Secure Enclave Processor (SEP) boots independently.
SEP handles:
- Face ID
- Touch ID
- passcode security
- key management
- encryption
SEP communicates with the main processor.
But runs separately.
This is critical.
A broken SEP can cause:
- activation issues
- Face ID failure
- boot delays
Stage 9: Launchd and Userland
Kernel starts:
launchd
This begins:
- system services
- UI services
- SpringBoard
At this point:
iPhone becomes usable.
This is full iOS boot.
Where Technicians See Failures
Understanding failure stage matters.
BootROM Failures
Symptoms:
- DFU issues
- exploit failures
Rare.
iBSS / iBEC Failures
Symptoms:
- restore stops early
- ramdisk boot fail
- error during DFU flash
Usually firmware-related.
iBoot Failures
Symptoms:
- Apple logo loops
- restore errors
- failed kernel load
Can indicate NAND or signature issues.
Kernel Failures
Symptoms:
- panic loops
- reboot cycles
- sensor panics
Very common.
NAND Failures
Symptoms:
- boot loops
- stuck restore
- data corruption
Common in damaged boards.
SEP Failures
Symptoms:
- Face ID unavailable
- activation issues
- long boot time
Critical for paired parts.
Boot Process and checkm8
checkm8 attacks:
BootROM
This gives:
- code execution before signature checks fully enforce
Then tools can:
- patch iBSS
- patch iBEC
- load custom ramdisks
- access NAND
This changed repair workflows forever.
This is why BootROM exploits matter so much.
Technician Diagnostic Examples
Stuck at Apple Logo
Likely:
- iBoot issue
- kernel issue
- NAND issue
No IMEI
Likely:
- baseband initialization failure after kernel boot
Related:
Baseband Fault Identification in iPhone Logic Boards
Panic Reboots
Usually:
kernel stage.
Read panic logs.
Restore Error 4013
Could involve:
- NAND
- Tristar
- USB communication
- iBEC transfer
Related:
Tristar / Hydra IC Failure Symptoms Explained
Why This Matters
The boot process is the foundation of:
- firmware repair
- exploit research
- NAND diagnostics
- panic log analysis
- activation analysis
- baseband diagnosis
Without understanding boot stages:
repair becomes guessing.
With it:
you can isolate faults much faster.